In the culturally rich landscape of Nepal and India, earrings are rarely just accessories. They are heirlooms, symbols of marriage, markers of status, and an integral part of daily identity. From heavy gold jhumkas to intricate hoops, jewelry is woven into the fabric of our lives. However, this beauty often comes with a hidden cost. Over years of daily wear, gravity takes its toll. The delicate skin of the earlobe—soft, pliable, and lacking the structural support of cartilage—begins to yield.
What starts as a slightly stretched piercing can eventually transform into a complete slit, dividing the lobule into two distinct flaps. This condition, medically known as a "cleft earlobe" or "split earlobe," is one of the most common aesthetic concerns I encounter in my practice in Birgunj. While it is not a medical emergency, the psychological impact is profound. Patients often report feeling self-conscious, hiding their ears with hair, and feeling a sense of loss at being unable to wear the jewelry that defines their style.
Recently, I had the privilege of treating a patient whose journey perfectly illustrates both the problem and the elegant solution that modern dermatologic surgery offers. This article documents that journey inside my Operation Theater, breaking down the science, the art, and the results of Lobuloplasty.
The Case Presentation
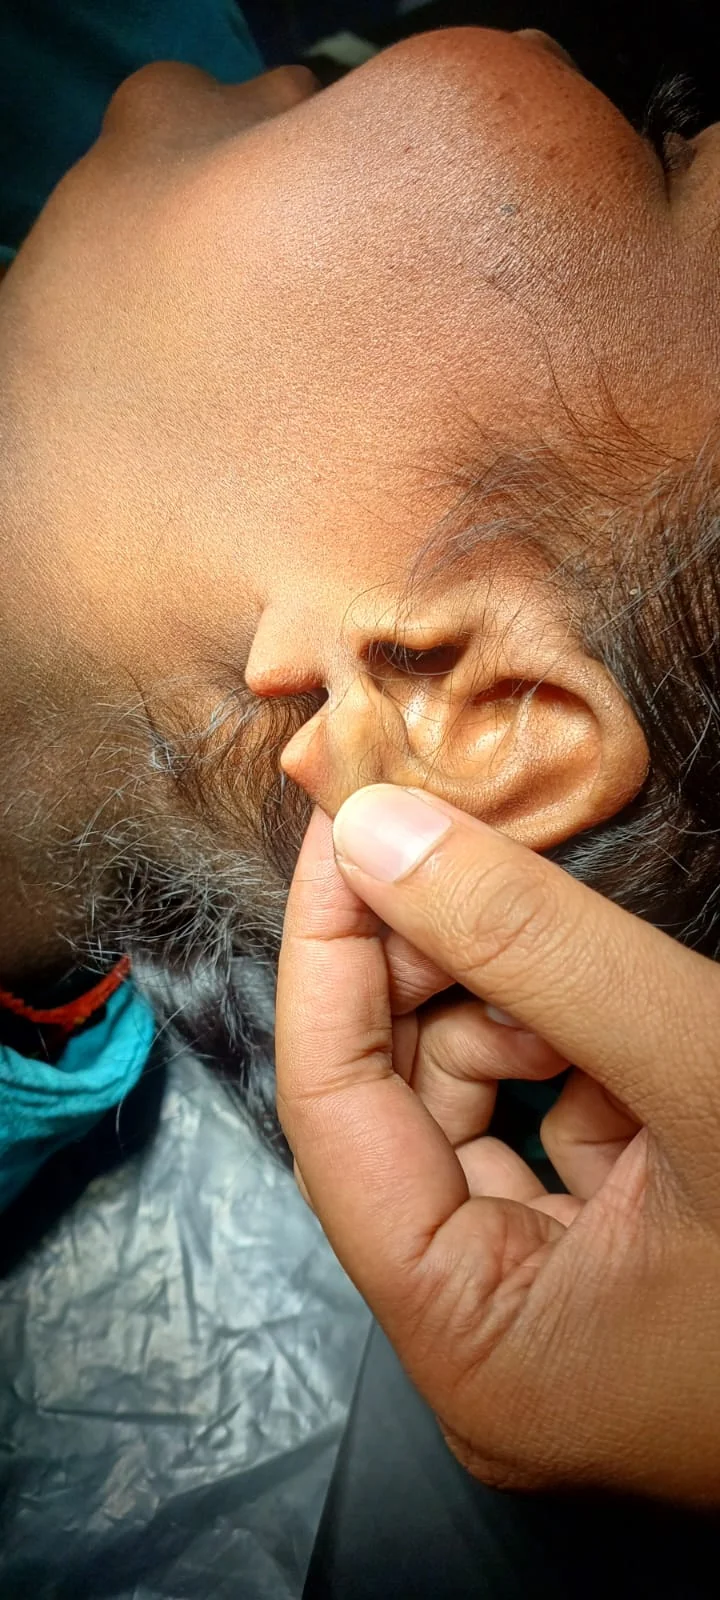
The patient presented to my clinic with a fully split earlobe on the left side. As seen in the initial examination (and documented in the "Before" images from our case file), the original piercing site had migrated downwards over time until it sliced completely through the bottom edge of the earlobe.
This specific type of injury is classified as a Complete Cleft. Unlike a partial cleft, where the hole is just elongated, a complete cleft leaves the earlobe looking like a "W" or a snake’s tongue.
Patient History:
-
Cause: Chronic traction from heavy earrings used over number of years.
-
Symptoms: Inability to wear earrings, visual deformity, and social embarrassment.
-
Goal: To restore the natural rounded contour of the earlobe and eventually re-pierce the ear to wear jewelry again.
Upon examination, the tissue surrounding the cleft was healthy, though fully healed. This is a crucial detail. One cannot simply stitch the two flaps together; the skin has "healed" over the split. For the ear to fuse back into a single unit, we must surgically intervene to create fresh, raw surfaces that biological healing can bind together.
Pre-Operative Assessment and Planning
Before any procedure begins, the planning phase is critical. In my practice, I emphasize a "measure twice, cut once" philosophy.
For this case, I opted for a Lobuloplasty with Simple Closure technique. Since the tissue loss was minimal (it was a tear rather than a chunk of tissue missing), a complex flap surgery was not necessary. However, the alignment had to be perfect. If the anterior (front) and posterior (back) skin edges are not perfectly matched, the earlobe can heal with a "step deformity"—an uneven ridge that looks unnatural.
The Aesthetic Goals:
-
Symmetry: Ensure the repaired lobe matches the size and shape of the opposite ear.
-
Smooth Contour: Avoid the "pointed" or "elf-ear" look that can result from poor suturing at the bottom edge.
-
Minimal Scarring: Place incisions and sutures in a way that the final scar is virtually invisible.
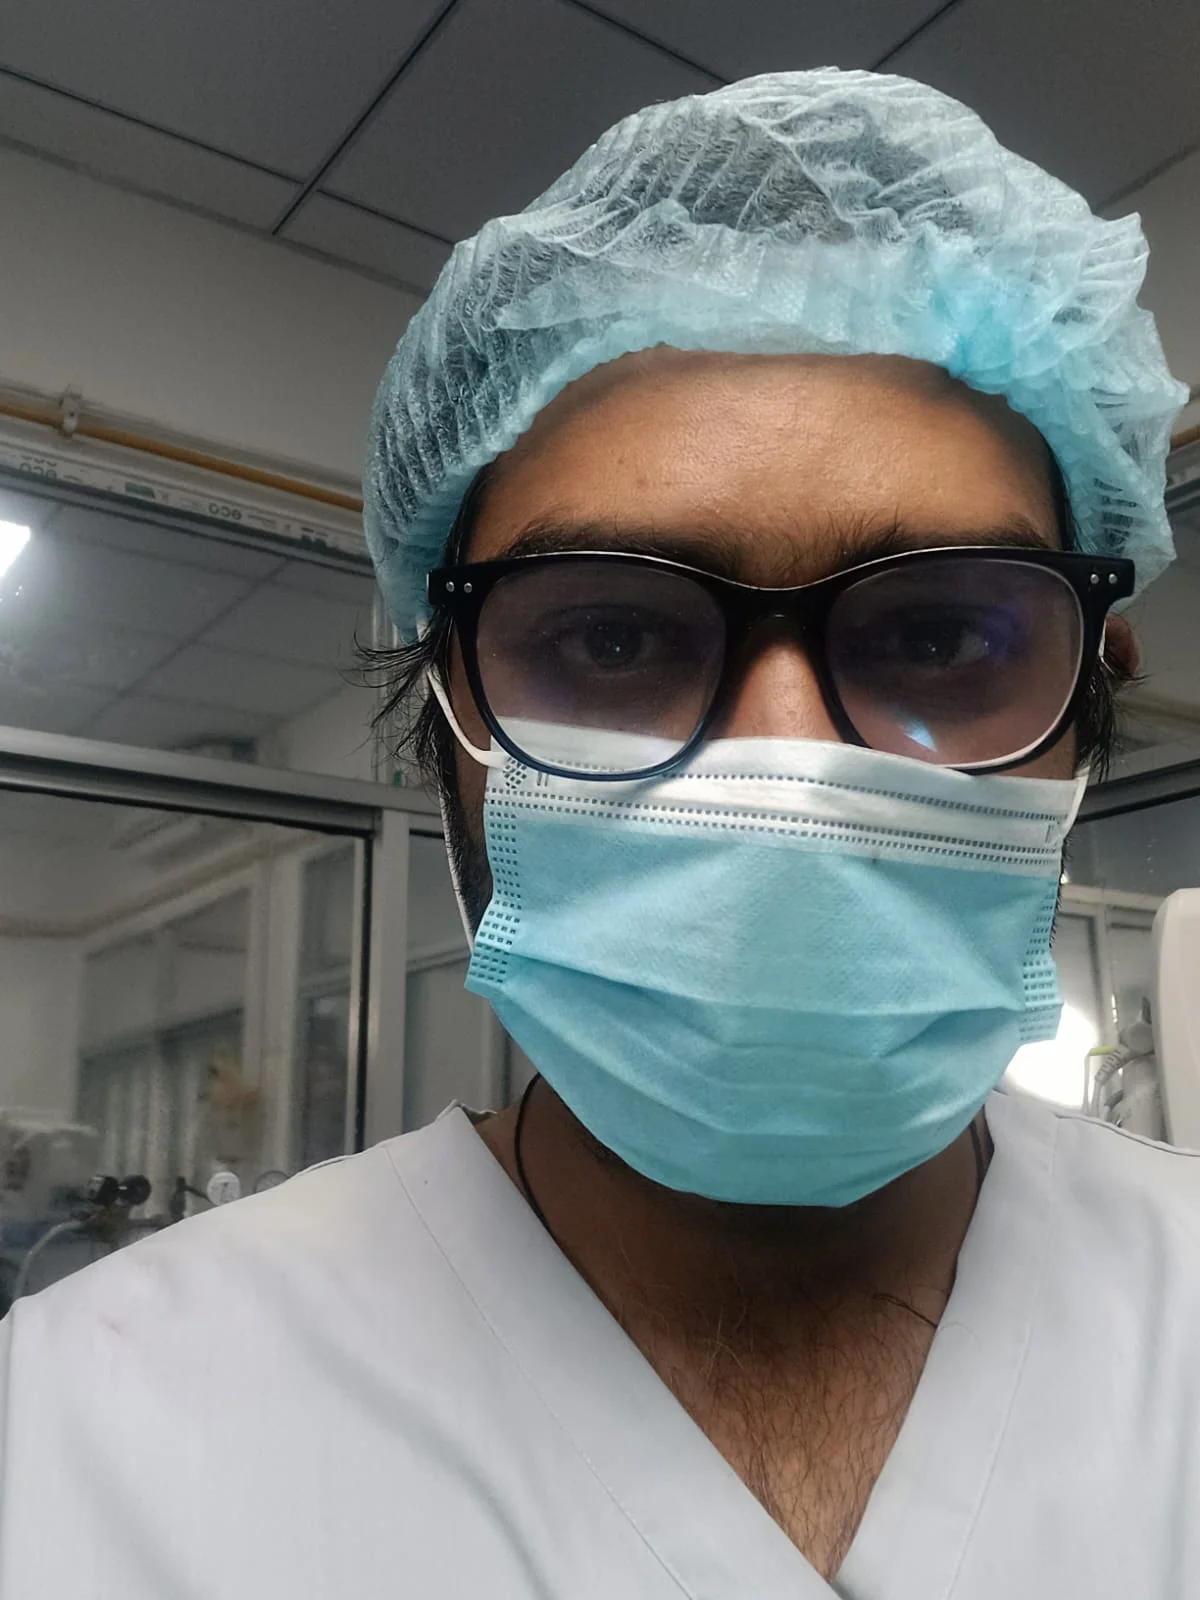
The Procedure: Inside the OT with Dr. Rohit Gupta
The surgery was scheduled as a minor outpatient procedure. The patient walked in, and the entire process was completed in under 45 minutes. Here is a step-by-step walkthrough of what happened behind the sterile drapes.
Step 1: Sterile Preparation and Painless Anesthesia
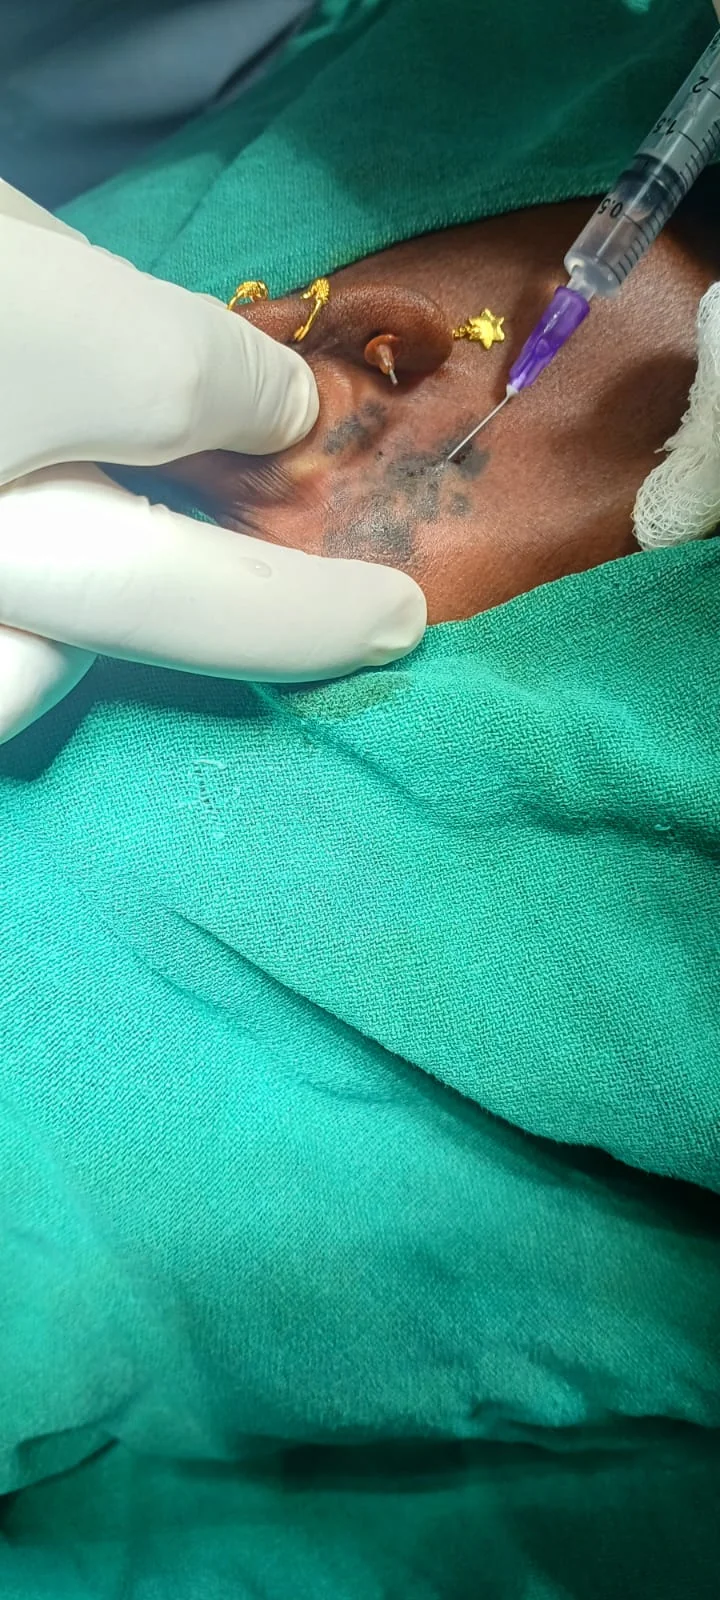
In the images captured during the surgery, you can see the initial step of preparation. Fear of pain is the number one reason patients delay this surgery. I take great care to ensure this fear is unfounded.
We cleaned the earlobe and surrounding neck area with a strong antiseptic to create a sterile field. I then used a very fine-gauge needle to inject a local anesthetic solution. I use a specialized mixture that not only numbs the area but also constricts the tiny blood vessels, which minimizes bleeding and bruising.
The patient felt a momentary "ant bite" sting, and within 30 seconds, the ear was completely numb. Throughout the surgery, the patient remained awake and comfortable, chatting with me as I worked.
Step 2: The "Freshening" of Margins
This is the most critical part of the surgery. As mentioned earlier, the split sides of the earlobe are covered in healed skin. If you stitch skin to skin, it will not fuse.
Using a precise surgical blade, I carefully excised the skin lining the cleft. This process is called "freshening the edges." It involves removing a thin strip of skin from both sides of the split to expose the raw tissue beneath.
In this specific case, I utilized a technique to prevent "notching." If you simply cut straight down and stitch, the scar contracts as it heals, pulling the bottom of the earlobe upward and creating a small notch or dent. To prevent this, I performed a small modification at the bottom rim—breaking up the straight line of the scar to support the rounded weight of the lobe.
Step 3: Layered Closure and Suturing
Once the raw edges were prepared, the reconstruction began. Earlobe repair is deceptive; it looks simple, but it is a 3D structure. We have to repair the front, the back, and the bottom rim.
-
The Internal Layer: I placed a few deep, buried sutures using dissolvable material. These sutures hold the "meat" of the earlobe together, taking the tension off the skin. This ensures that the scar doesn't stretch out later.
-
The External Layer: As seen in the close-up images from the OT, I used very fine, non-absorbable sutures. These are thinner than a human hair and are designed specifically for cosmetic facial procedures.
I started suturing from the bottom rim to ensure perfect alignment of the curvature. This is the "money shot"—if the bottom rim is misaligned by even a millimeter, it is visible to the naked eye. Once the rim was secured, I placed interrupted sutures along the front and back of the earlobe.
Step 4: Immediate Results
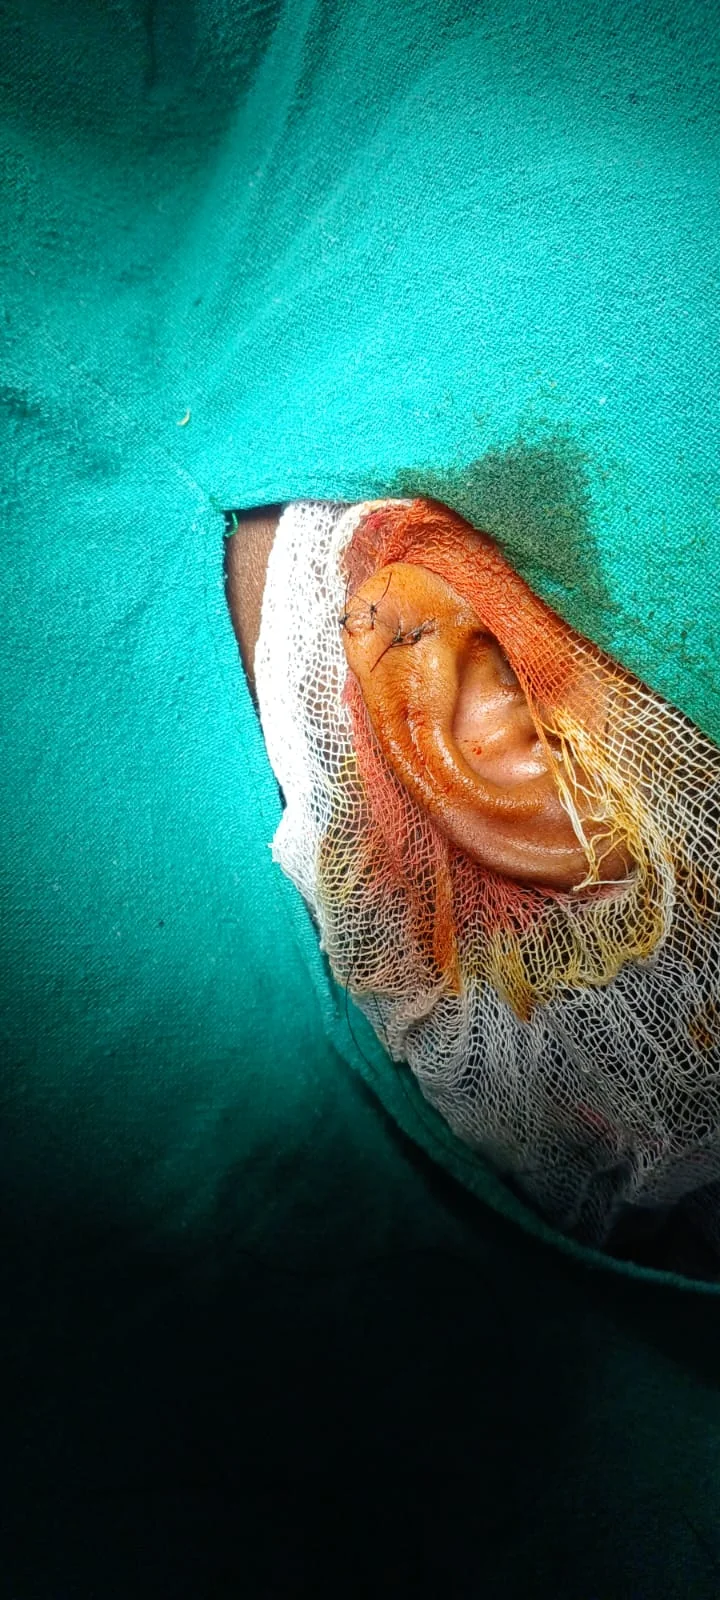
The final image in our series shows the earlobe immediately after the last stitch was placed. The transformation was instant. Where there was once a deep, gaping split, there was now a singular, cohesive earlobe.
The incision line was neat, the bleeding was non-existent, and the shape was effectively restored. We applied a small protective dressing, and the patient was ready to go home.
Post-Operative Care and Recovery
The success of a Lobuloplasty is 50% surgery and 50% aftercare. I provided the patient with detailed instructions to ensure optimal healing:
-
Hygiene: The wound must be kept dry for the first 24 hours. After that, gentle cleaning and application of an antibiotic ointment is recommended twice daily.
-
Suture Removal: Since we used specialized skin sutures (which cause less scarring), the patient was scheduled to return in 7 days for removal.
-
Sleeping Position: I advised the patient to try and sleep on their back or the unaffected side for a few nights to avoid putting pressure on the repair.
The Healing Timeline:
-
Day 1-3: Mild swelling and tenderness are normal.
-
Day 7: Sutures are removed. The scar will look red and slightly raised.
-
Month 1-3: The scar begins to mature, fading from red to pink, and eventually to a pale skin tone. The tissue softens.
-
Week 8: This is the milestone for re-piercing.
The Question of Re-Piercing
The most common question I get asked is, "Doctor, can I wear earrings again?" The answer is a resounding yes, but with caveats.
I advised this patient to wait at least 6 to 8 weeks before getting the ear re-pierced. This allows the scar tissue to regain adequate strength. Furthermore, when we do re-pierce, I will place the new hole slightly to the side of the scar line, rather than directly through it. Scar tissue is not as strong as virgin skin; piercing through the scar increases the risk of the split recurring.
I also counseled the patient on "earring hygiene" for the future:
-
Avoid sleeping in heavy earrings.
-
Reserve heavy traditional jewelry for special occasions only.
-
Use supportive patches or "lobule support" stickers behind the ear when wearing heavy items to distribute the weight.
Why Choose a Specialist?
In an era of DIY hacks and quick fixes, surgery of the face and ears should always be entrusted to a specialist. As a dermatologist and surgeon, I understand the biology of the skin. I know how it stretches, how it scars, and how it heals.
An improperly performed earlobe repair can lead to keloids (large, lumpy scars), unsightly notches, or infection. In my clinic in Birgunj, we adhere to strict sterilization protocols (as evidenced by the sterile drapes, gloves, and instruments in the photos) to ensure zero risk of infection.
Conclusion
The split earlobe is a small deformity with a large impact. It serves as a constant reminder of age or damage, often preventing women (and men) from expressing themselves through their cultural adornments.
The case documented here is a testament to the effectiveness of Lobuloplasty. It is a procedure that offers high satisfaction with low risk. Seeing the patient look in the mirror after the dressing was applied, seeing the relief that the "gap" was gone, is why I do what I do.
If you are struggling with stretched, torn, or split earlobes, know that you do not have to live with them. The solution is quick, painless, and readily available.